How to get different icons on each Windows virtual desktop
Windows virtual desktops are a clean way to separate your windows, but the desktop itself stays the same on every one of them; the Desktop folder is shared, so the same files and icons follow you everywhere. Windows has no built-in way to change this, so that's where WorkTop comes in. Each virtual desktop gets its own desktop folder, with its own files, icons, and layout, switched in automatically when you change virtual desktops.
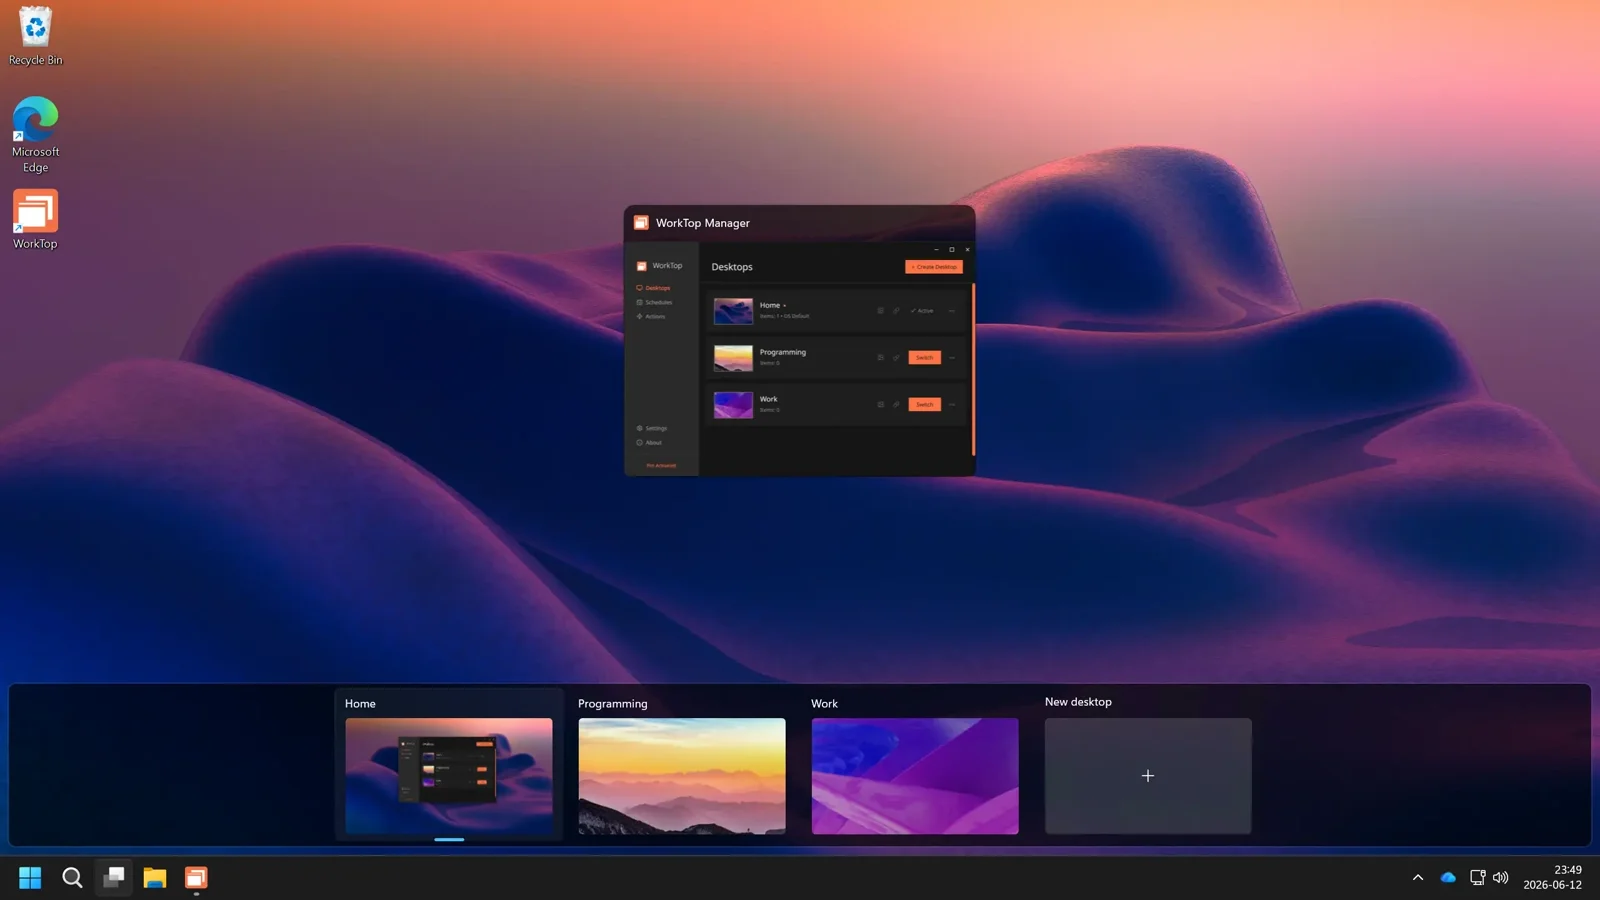
How linking works
WorkTop gives you multiple real desktops on Windows. Each one is its own folder, and switching changes which folder Windows shows you as your desktop. Virtual desktop linking ties these desktops to your Windows virtual desktops, one-to-one, so that when you switch virtual desktops with Win+Ctrl+Arrow, Task View, or a trackpad gesture, WorkTop switches to the linked desktop with it. For the full picture of how WorkTop desktops work on their own, see How to get multiple desktops with different files on Windows.
Setting it up
Linking is turned on in WorkTop's settings. Double-click the tray icon (or launch WorkTop from the Start menu) to open the Manager, go to Settings in the sidebar, and enable Virtual desktop linking under General, then save.
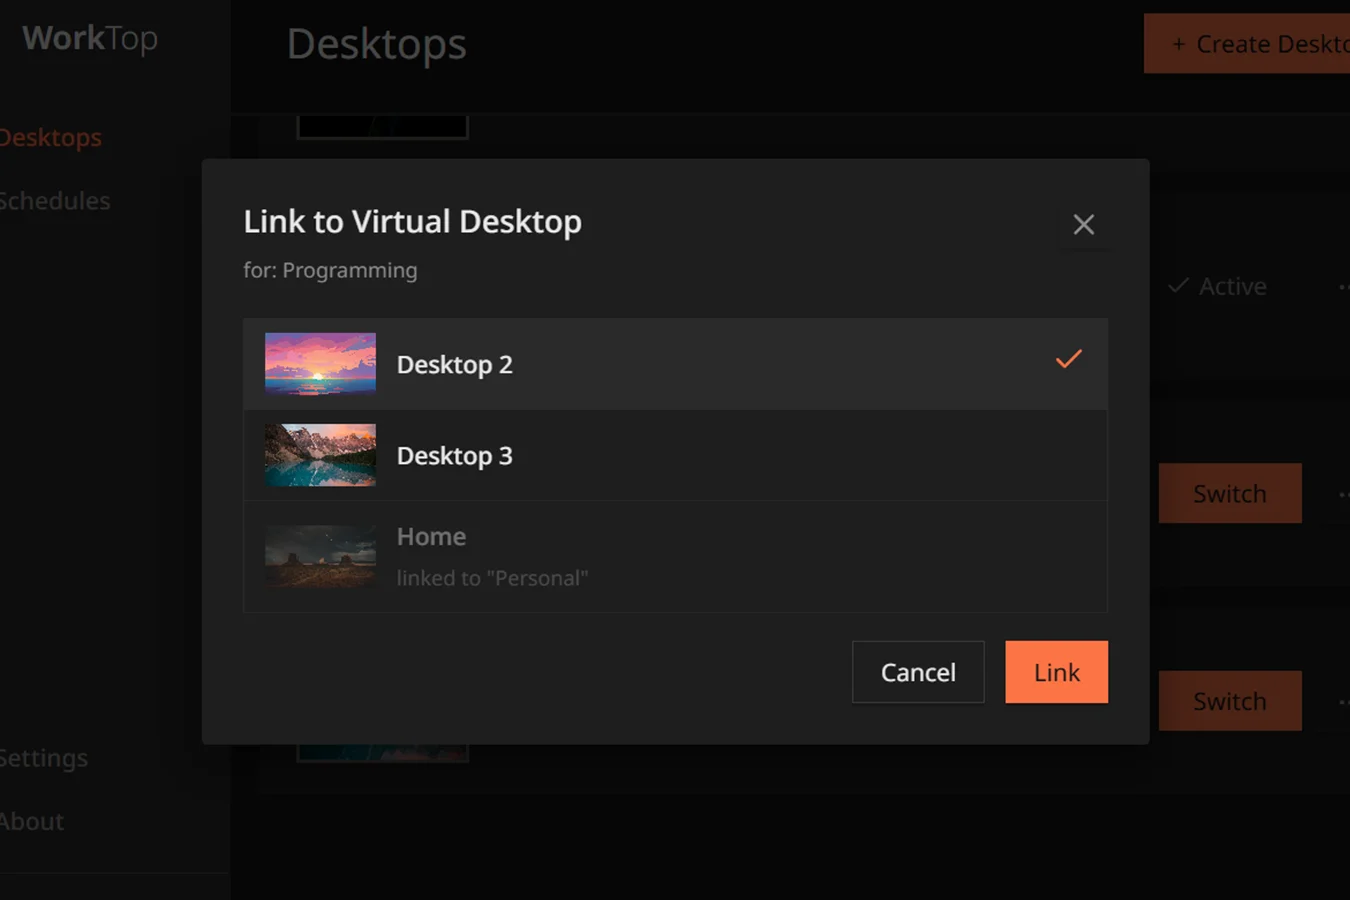
With the setting enabled, each desktop can be linked from its card in the Manager. Open the ... menu on a card, select Link to Virtual Desktop, and pick which virtual desktop it should follow. The dialog lists all your current virtual desktops, with the ones already claimed by another desktop greyed out; links are one-to-one in both directions. A link icon appears on the card once the desktop is linked.
If you are creating new virtual desktops, there is a faster route. When you create one, for example with Win+Ctrl+D, WorkTop detects it and offers to create and link a matching desktop in one prompt. Choose Create & Link and the new virtual desktop starts with an empty desktop of its own, ready for whatever files belong in that context.
What to expect when switching
The link works from the Windows side: you switch virtual desktops the way you always have, and WorkTop follows. There may be a brief moment between the virtual desktop changing and the files swapping in, which is normal and depends on how quickly Windows reports the switch. Switching from inside WorkTop, with the Quick Switcher or the tray menu, changes your files in place but leaves the virtual desktop where it is, so with linking enabled it makes sense to treat Windows' own navigation as your switcher. If you want to commit to that fully, the Quick Switcher hotkey can be disabled in Settings.
Wallpapers are handed over to Windows while linking is enabled; Windows manages per-virtual-desktop wallpapers itself, and WorkTop setting them during switches would conflict with that, so set your wallpapers through Windows as usual.
You also don't need to link every virtual desktop. One without a link simply doesn't trigger a switch, and keeps whatever desktop was last active, so you can give separate icons to the two or three contexts where it matters and leave the rest alone.
Next steps
WorkTop's free tier supports three desktops, which covers a typical virtual desktop setup. The Pro license increases that to unlimited and adds scheduled switching and unlimited actions.
If you want commands to run when you switch, like loading a different Rainmeter layout per desktop, actions fire on linked switches too; see How to switch Rainmeter layouts per desktop. The full reference for linking, including unlinking and what happens if a linked virtual desktop is deleted, is in the virtual desktop linking docs, and the rest of WorkTop is covered in the docs.