How to switch Rainmeter layouts per desktop
Each WorkTop desktop has its own files, icons, and arrangement, giving you multiple separate workspaces for different projects or contexts. If you use Rainmeter, you can also integrate your layouts into that same context management, with each desktop loading an associated set of Rainmeter skins whenever you switch.
On Pro this is as easy as setting up one Action per switch with the
appropriate !LoadLayout command. Free users can achieve
the same functionality with a bit more involved scripting.
Understanding the action system
Alongside its desktops, WorkTop can run a command of your choosing whenever you switch between them. Commands are configured in the Actions section of the app, and this is the feature that will let us load a Rainmeter layout based on what desktop we are switching to.
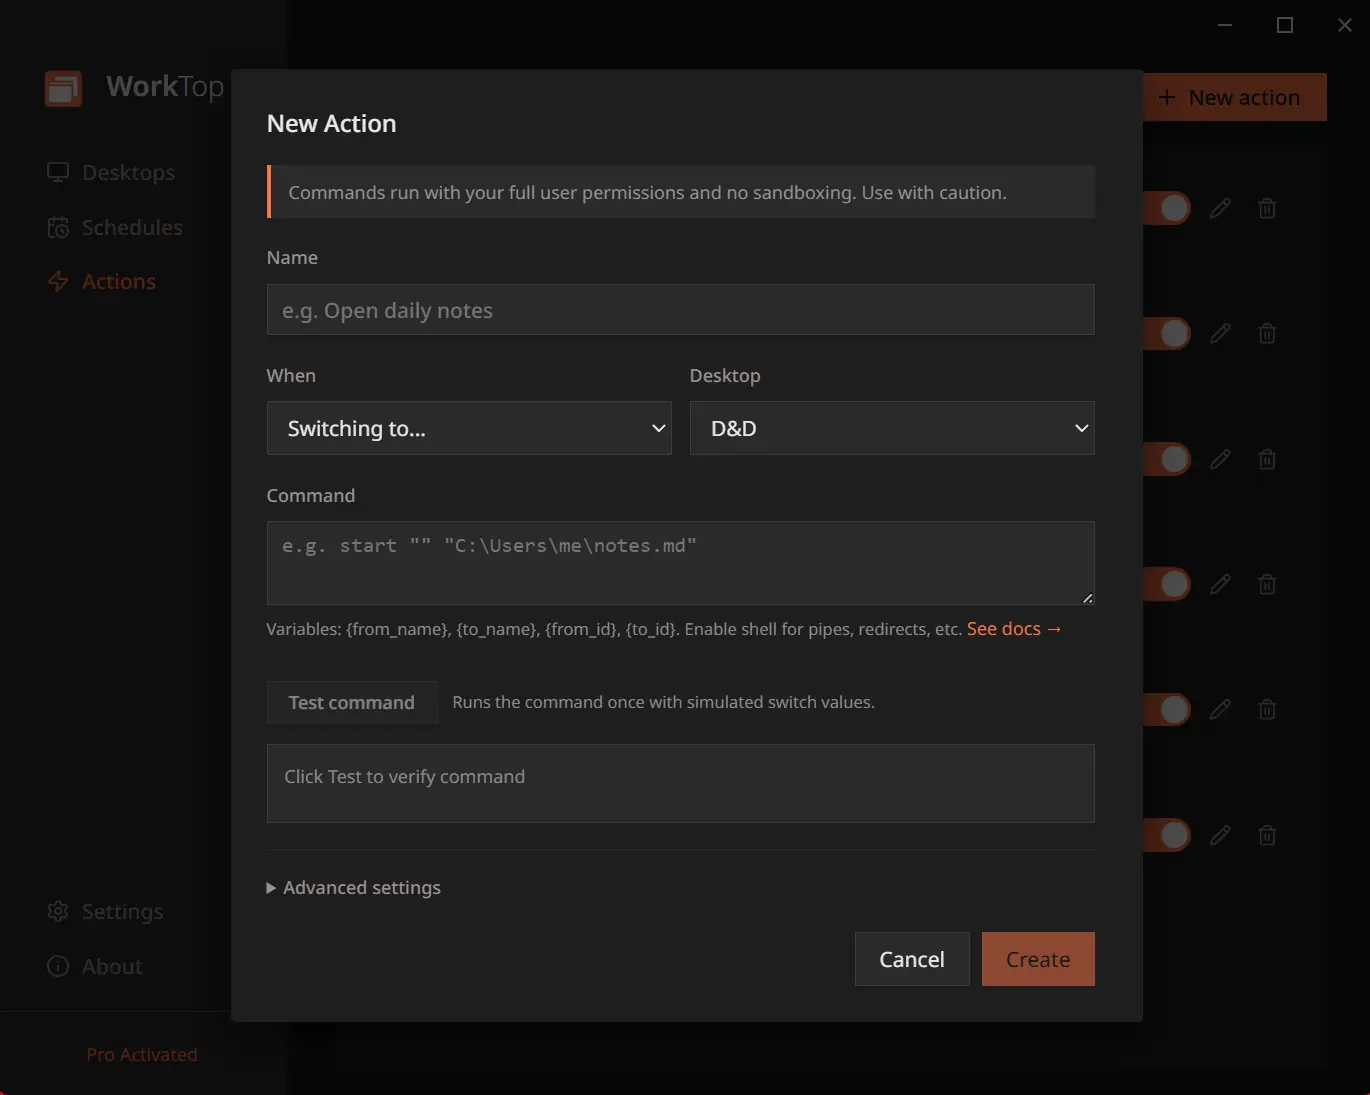
Setting it up on Pro
To create an Action, you give it a name, set the triggering event, and select the desktop it applies to. After that you input the command string just as you would in the Command Prompt:
"C:\Program Files\Rainmeter\Rainmeter.exe" !LoadLayout "Work"
Substitute "Work" for one of your layouts. You can
test run the command to verify it works, and you should see the
layout change. Actions also have some advanced settings but they
aren't relevant for this guide. You can read more about them in
the Actions docs.
Repeat for each desktop you want a layout on, and you'll have one Action apiece.
For free users: scripting the same functionality
The free version of WorkTop is limited to a single Action, but this single Action allows you to manually implement essentially the same functionality that Pro makes more convenient. With the use of the Any desktop switch trigger and Action variables, combined with a simple script, you can load the corresponding layout just as well as with multiple distinct Actions.
First, create a PowerShell script. Call it
switch-rainmeter.ps1 and save it somewhere that makes
sense. For this guide we'll use C:\scripts:
param([string]$Desktop)

$rainmeter = "C:\Program Files\Rainmeter\Rainmeter.exe"

# Map each desktop name to the layout you want loaded on it
$layout = switch ($Desktop) {
    "Personal" { "Clean" }
    "Work"     { "Work" }
    "Focus"    { "Monitoring" }
    default    { $null }
}

if ($layout) {
    & $rainmeter !LoadLayout $layout
}
The switch block maps each desktop name to the
Rainmeter layout you want to load. Edit those lines to match your
own desktops and layouts. The default { $null }
line means any desktop you haven't listed just keeps its current
layout instead of erroring out. You could also create an empty
layout if you prefer.
Now create the Action in WorkTop:
- Double-click the tray icon (or launch WorkTop from the Start menu) to open the Manager, then click Actions → New action.
- Give it a name, like Rainmeter layout.
- Set When to Any desktop switch.
-
Set the Command to:
powershell -ExecutionPolicy Bypass -File "C:\scripts\switch-rainmeter.ps1" -Desktop "{to_name}" - Click Test command to check it runs (see the note below), then Create.
{to_name} is a WorkTop variable: before running
the command, WorkTop replaces it with the name of the desktop
you're switching to. So switching to your Work desktop runs the
script with -Desktop "Work", the switch
block picks the Work layout, and Rainmeter loads it. The quotes
around {to_name} make sure it works even if a
desktop name has spaces.
That's it. One Action now handles every desktop, and adding a fourth is one more line in the script. No new Action to create.
If your WorkTop desktops are linked to Windows virtual desktops, the same Action fires when you switch virtual desktops too, so your Rainmeter layout follows them as well. See linking to virtual desktops.
Finer control: individual skins instead of whole layouts
Layouts are the right tool for most setups. You arrange your skins
once, save the layout, and switch to it as a single unit. If you
want more granular control, loading and unloading individual skins
rather than swapping the whole arrangement, use
!ActivateConfig and !DeactivateConfigGroup
in place of !LoadLayout:
"C:\Program Files\Rainmeter\Rainmeter.exe" !ActivateConfig "monitoring\cpu" "CPU.ini"This is more verbose and more work to keep in sync, so it's only appropriate when per-skin control actually matters. For most people, layouts are simpler.
Going further
The script above is one case of a general pattern: branch on
{to_name} (or {to_id} if you'd
rather key off the desktop's stable GUID than its name), then run
whatever command fits. The same method works for muting
notifications, starting a dev server, changing your audio output,
anything you can put in a script. For the full pattern and the
complete list of variables WorkTop makes available, see
Scripting with variables.